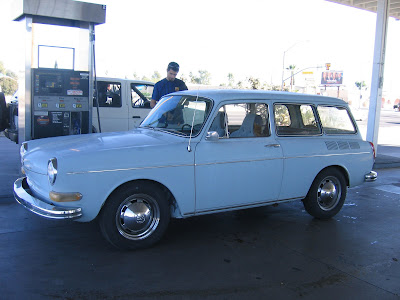
The charm of a falling apart but maintained volkswagen is something that not a lot of people understand. I like the idea, but not for this car. I drove the squareback for quite a while as it was, and I suppose I still am, seeing how I haven't gotten the new paint or the new interior yet and the interior that was in there is now ripped out. It probably looks worse than before, not to mention the feather sanding and bondo spots.
A few weeks ago I figured it was about time that I start working on it. the first thing I wanted to do was get the body straightened out. Not knowing much about body work other than how much it costs to get it done at Maaco I looked to a friend for some help. He had all the tools, experience and know how to get the job done. After about five hours one afternoon we had the body banged out to where we wanted it and started with the first layer of bondo. I took the car home and figured I could manage the rest. Somethings I learned on my own, use proper bondo tools, be careful not to sand the bondo down too far, and the process, depending on the dent, can take many layers.
Time I have, money I don't. So even if maaco could have done it faster, me doing the work will be better and cheaper.
After I started on sanding all the chips, dents, and bondo I began to tear out the interior. This has been extremely easy, a few snaps, clips, and a hand full of bolts and the inside of my car is naked and cold. Along with that process I began to rip out all of the dry rotted door rubber which will be replaced after the paint job.
Everything, I have discovered, just like everything else in life, (paying of school loans) takes more time than you thought.
This is where I am at now. Majority of the interior is out, sanding is almost done and a decision of what color to paint it is at hand.


 . Glue residue everywhere, more cleaning pictures to come, a lot of before and after pics. The wheel wells had black crusty plastic on it which was chipped off and away and then I cleaned up the dried glue. For some reason my computer won't post a vertical picture, so here it is horizontal. Deal with it.
 So here is what the door looked like after the rubber was pulled and the panel is off. Inside the torn plastic is old crusty heat/sound insulation. I figured I would rip that out and put new insulation in, this turned out to be a decision of many hours. After I pulled all of the insulation that I could by hand I
 grabbed my 5 in 1 tool and started scrapping. This I did for a few hours and finally, with a number of skinned knuckles later, it was all off. The passenger side was not as big of a pain in the butt. After all the black insulation was scrapped out, I used my decal remover to take off the rest of the glue and grime. What I am left with is a completely clean door, a clean surface to glue to when I put in my new sound insulation. Was it worth all the hours? Maybe, maybe not, but at least it is done right.


 Can cars get chicken pox? Cause it sure does look like my car has some sort of rash, and when you sit in the seats, they make you itch like crazy.


